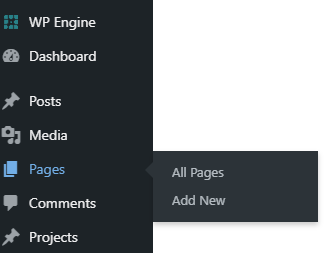
- Login to your website and head to the ‘pages’ tab on the left hand side menu. Clicking on ‘add new’ will bring you to the page editor.
2. From here, add the page title, content, and page settings.
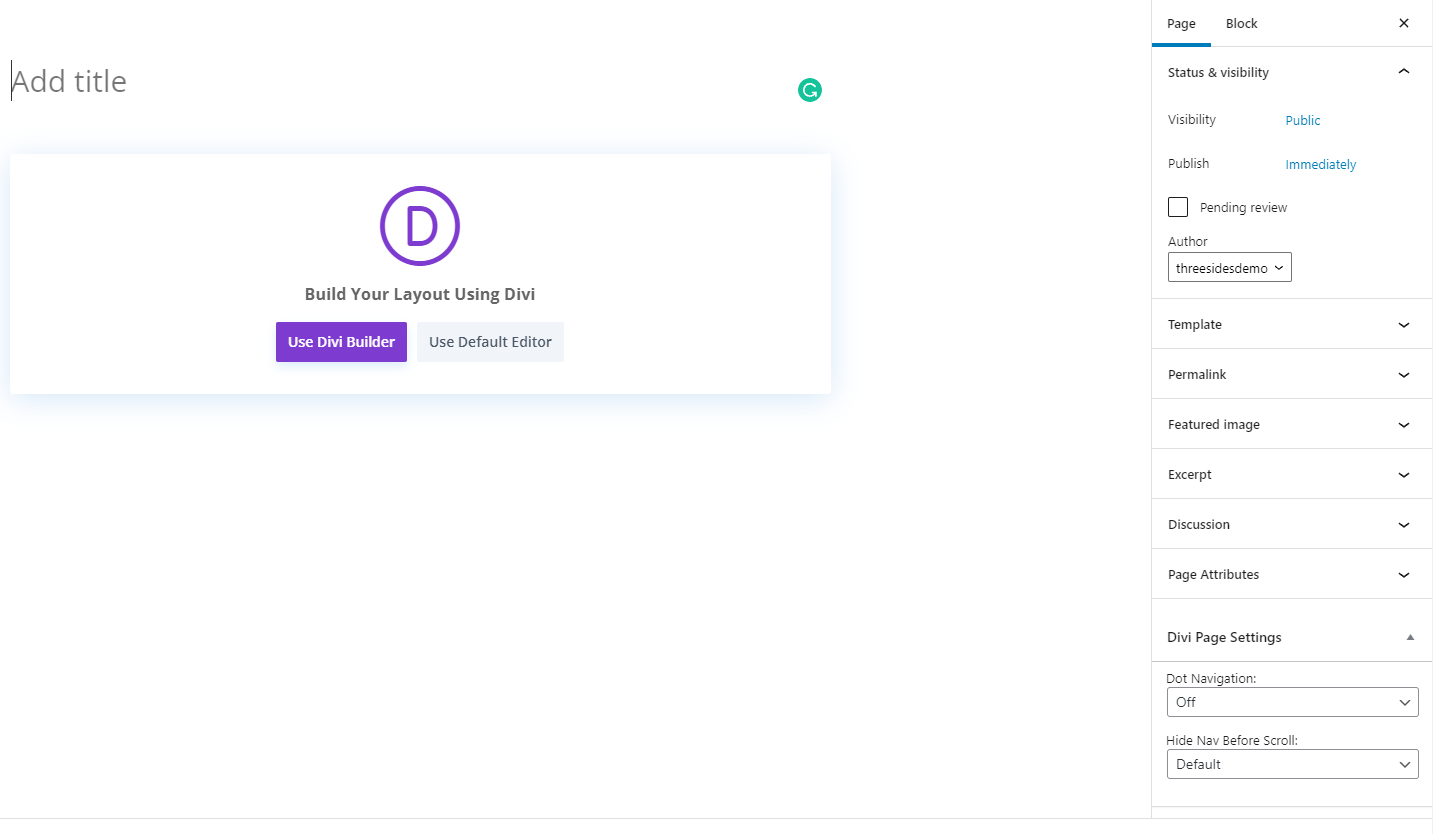
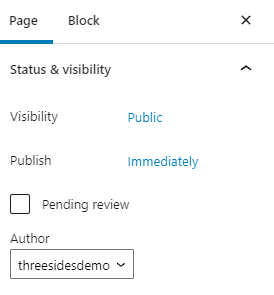
3. Some key settings to adjust before publishing is the ‘status & visibility’ section, which allows you to customise when you want the post to be published and who it’s visible to.
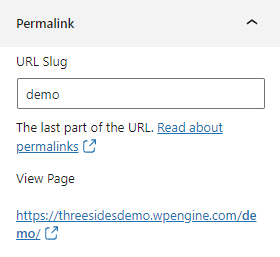
4. Another key feature is the ‘Permalink’ which is where you can adjust the URL slug for your page.
5. Other page settings are optional and customisable to suit the page type.
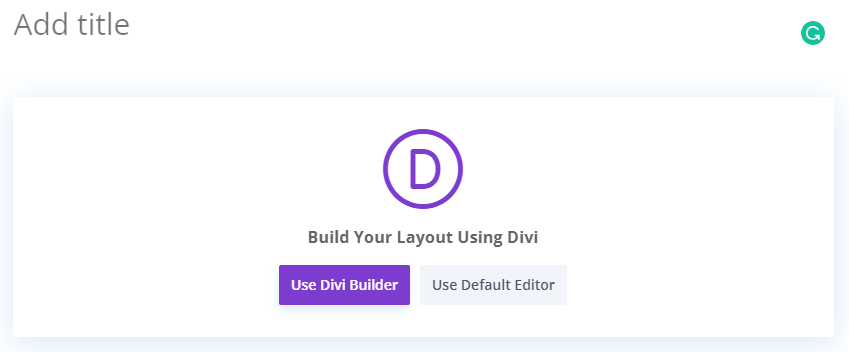
6. Once page settings have been set up and a title has been assigned, you can click the ‘Use Divi Builder’ button to begin populating content in Divi.
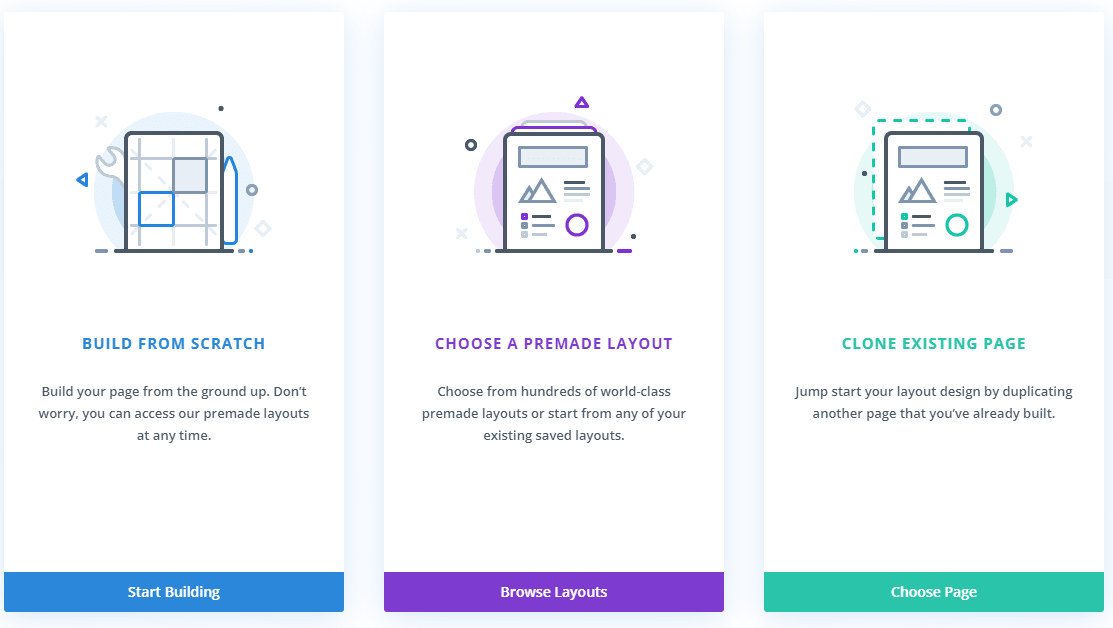
7. Divi gives you the options to either build from scratch, choose a premade layout, or clone an existing page. If you have other pages you like the styling of, it’s easiest to clone this page and edit the content accordingly. When building pages with Divi, they can also be saved as templates to be copied from for other pages at a later date. For this example, we’ll choose ‘Build From Scratch’.
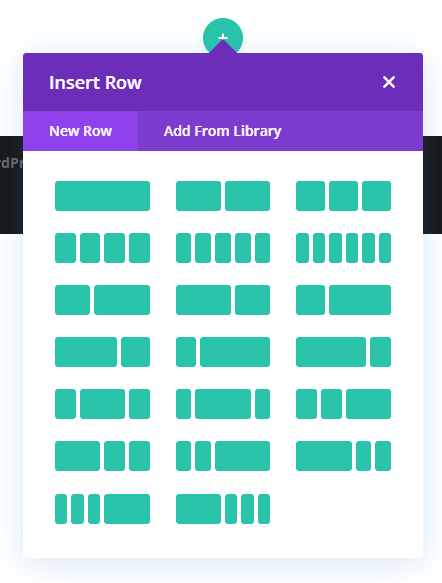
8. Divi is a visual builder that works in rows and modules. To start, choose the type of row you’d like. This can be a single block or multiple blocks in different sizes and aspects.
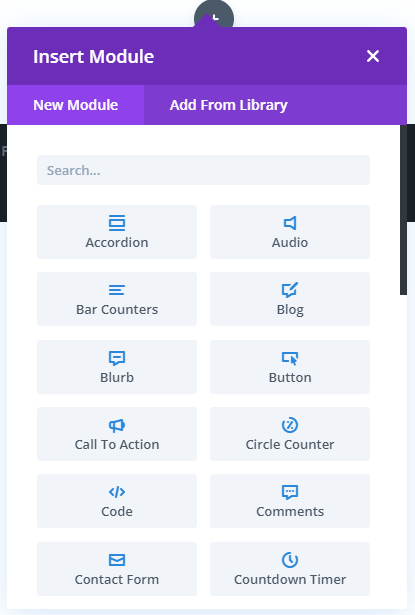
9. After choosing the row type, you’ll be prompted to choose a module type. Divi offers a large variety of module options that are completely customisable based on the type of page you’re building.
10. Choosing a module will bring up the module settings. The main tab here is the ‘Content’ tab. However, to customise further you can head into the ‘Design’ tab or ‘Advanced’ tab to add custom coding.
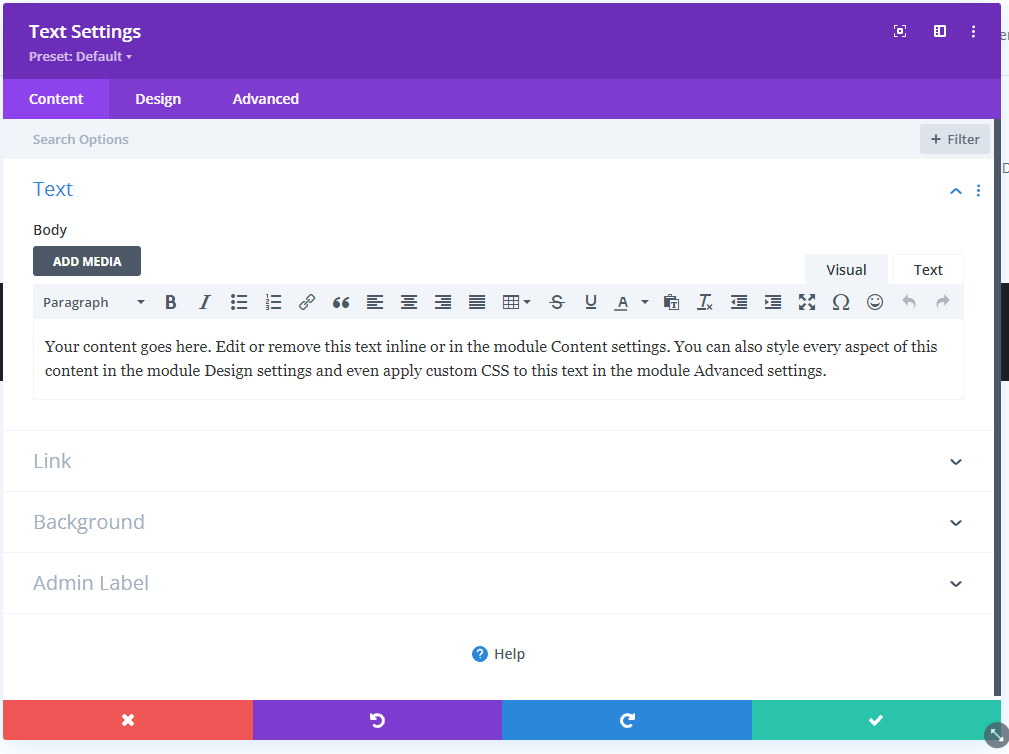
11. Once you’re happy with your module settings, click the green tick icon in the bottom right-hand corner of the module settings.
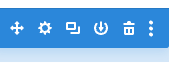
12. Hovering over the module or row will bring up a sub-menu where you can drag and drop modules and rows, duplicate them, delete them, save them to your library, or bring up the section settings by clicking on the cog icon.
13. You’re able to preview how your page will look on different devices by clicking the three purple dots at the bottom of the screen and toggling the gray menu in the bottom left-hand corner.
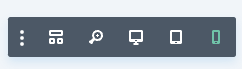
14. These three purple dots also bring up a page menu where you can; adjust the page settings, view the change history, save the page styling to your library, or most importantly, save and publish any changes you’ve made (bottom right-hand corner).
